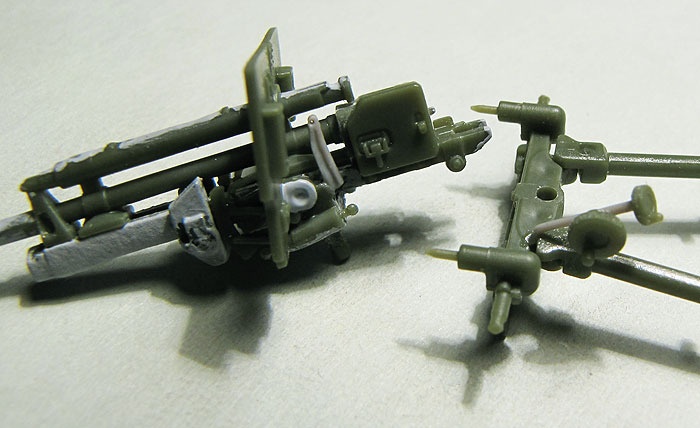
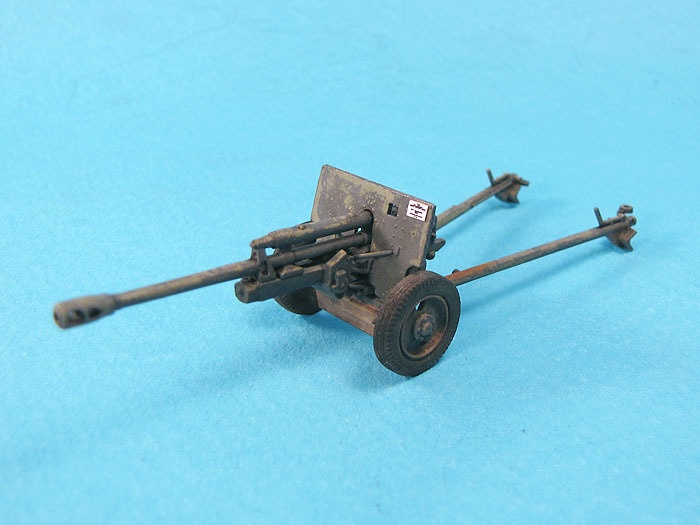
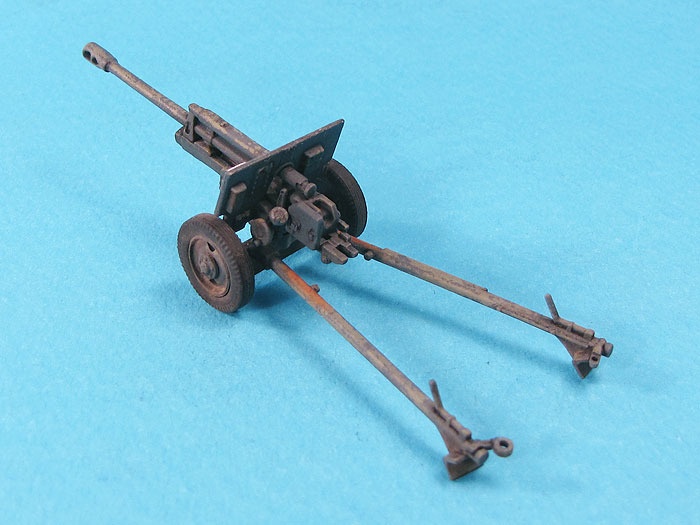
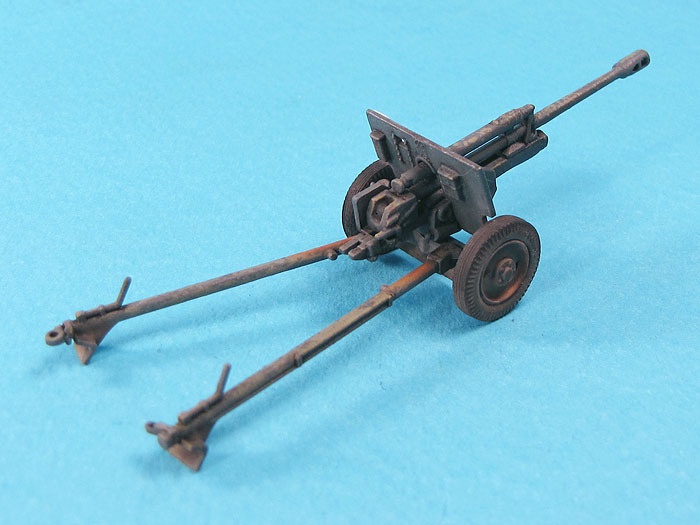
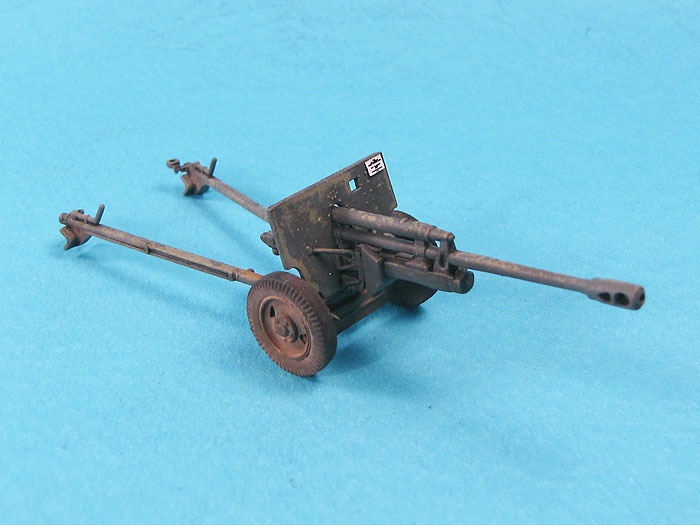
1/72 ZIS-3
Users' choice
This gallery has 3.95% of the users' votes.
By: Srdjan Radosavljevic
Manufacturer(s): UM
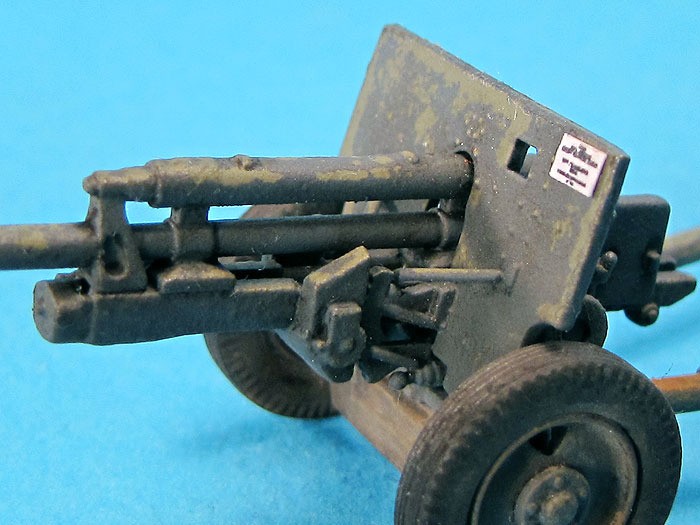
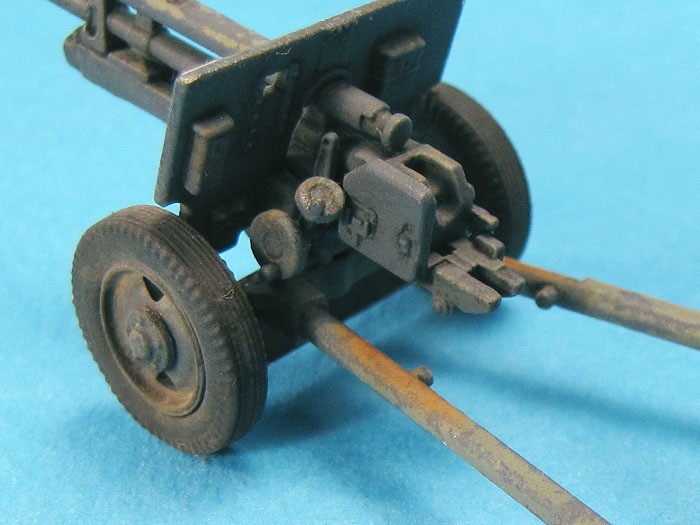
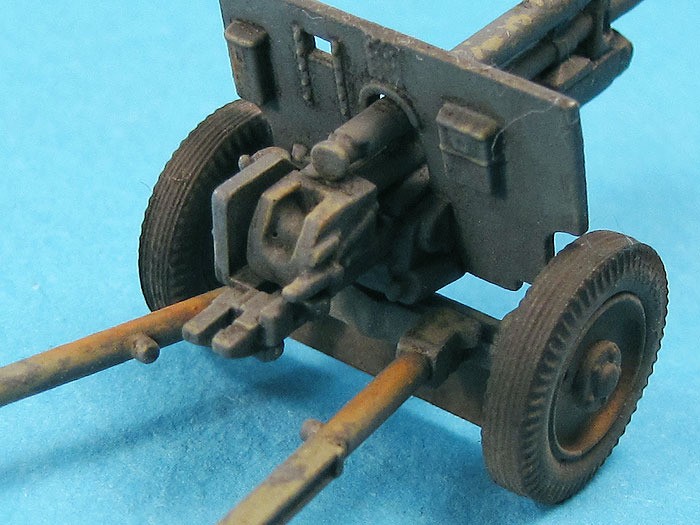
Modifications: Few details behind the armor plate were scratchbuilt from sprue, while tip of the gun barrel was drilled
Description: This model represents ZIS-3 that was used by Yugoslavian Army after WW2, and now it is part of permanent exhibition of Military Museum at fortress of Kalemegdan in Belgrade, Serbia. After assembling of model, I made iron texture with dissolved Tamiya putty, and then the model was given a coat of primer - black Cosmos spray. Next layer of paint was Revell enamel 362, and after that, I protected model with few thin layers of Future. As this gun was overpainted in some variant of Panzer grey later in Museum, which was chipped under influence of weather (gun is exposed outside of building of Museum), I decided to simulate this efect of chipped grey paint through "hairspray" technique. I sorayed hairspray over Future, and after few days of drying, I applied acryl MM Gunship Grey. 1 hour later I dipped various brushes into hot water and "scratched" ove grey colour to remove hairspray underneath, which actually removed parts of grey, making chips and scrtaches in process. After that I sealed work with another coat of Future, applied wash made of oil artist colours, and finished with mix of semi-gloss and matt varnish. I used MIG pigments for simulation of dust.... Plate with description of this gun on armor plate was done in CorelDraw and scaled down to 1/72 scale and printed on laser printer.... Humbrol liquid cement and old toothbrush to make texture on hull and turret. Gun and turret machine gun barrels are drilled. I "leveled" rear mudguards with Tamiya putty. As regards of painting, black Cosmos primer was the first layer of colour. After that I applied MM Olive Drab in few different shades. After layer of Future, I applied decals. Next was another layer of Future and wash made of Winton&Newton oil colours (Umbra) and white spirit. After layer of matt cote, I started with weathering steps. Mud (dried and drying wet) was made of MIG pigments (various shades), plaster, MIG acrylic resin, water and few more additional materials for texture. Rainmarks were made using pigments. Final touches were made with MIG pigments - various shades, and few chippings with "sponge" method... "gunmetal" artistic pencil was also used for chippings and highlighting metallic parts. This kit is an old ESCI kit so I had few assembling problems regarding to fitting of hull onto chasis because of interrior parts (engine and engine compartment walls), but indeed I had a lot of fun during weathering process ;)
- Judge 1
- A neat almost OOTB build, the paintwork is interesting and the 'museum exhibit' scheme is certainly novel, but it does make it rather difficult to asses the merits of the weathering applied, being rather atypical.
- Judge 2
- The construction is fine, I really like the rust & wear on the paint & wheels the chipping on the gun shield is a bit big & the breach could have more metallic wear visible.
- Judge 3
- I like the concept, quite a nice idea and pretty well executed too although the cast texture is a little too thick. I find that in this scale the best results are achieved by wetting the plastic with very thin liquid cement and tapping the damp surface with the stiff bristles of an old tooth brush for a few seconds, work in small sections at a time. You can then repeat the process until you’re happy with the result, if it’s a bit rough give it a gentle rub with a scourer pad or fine sand paper. I really like the rust and the name plaque is a very nice touch, keep up the good work.